How to create Github pages using Git and Github

If you are new to frontend web development and you are looking for the easiest way to deploy your project, Github pages is your best bet. it is fast, simple, easy and absolutely free. In this blog, I will walk you through how to create Github pages using git and github whether you're familiar with git and Github but you don't know how to create github pages or you're absolutely new to git and Github.
Let's get started by installing git in our local machine via: https://git-scm.com/. Walk through the installing process and you are good to go. You also need to create an account in Github, it is free and your credit card details won't be required. Create an account here: https://github.com/.
Your project is ready for production, right? It is time to push to Github for deployment using git. You can use git bash terminal by right-clicking on your desktop or use the terminal in your text editor. In this blog, we will be using git bash terminal. Let's go through the steps one after the other. Are you ready?
Step 1
Right click on your project folder and click "Git Bash Here".
Step 2
If Git doesn't know you, you will need to tell git your name and email address by using the git commands below:
git config --global user.name “[firstname lastname]” e.g git config --global user.name [john doe]
git config --global user.email “[valid-email]” e.g git config --global user.email [johndoe@gmail.com]
Step 3
type "git init" to initialize your project repository.
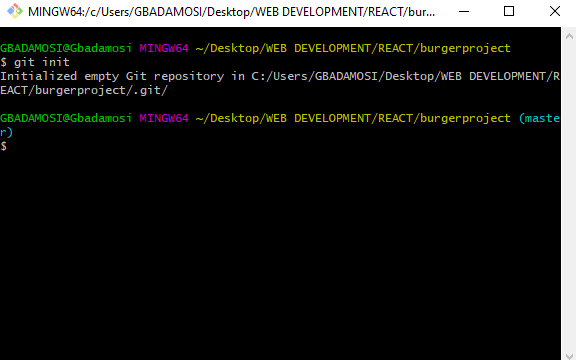
step 4
"git add ." to add all files into the staging area. You can check the status of your files in the staging area by running "git status". Files in green color are in the staging area while those in red are not.
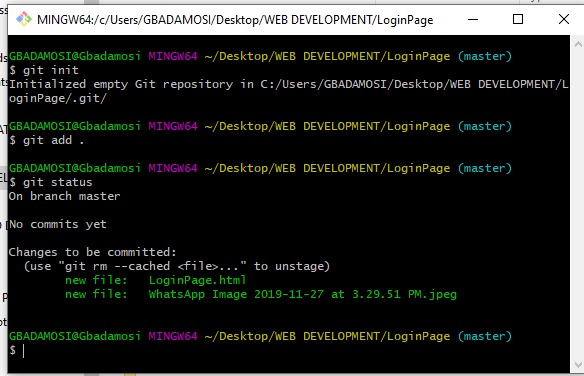
Step 5
Now that all files are in the staging area, it is time to commit our files with a message by running "git commit -m "Your message".
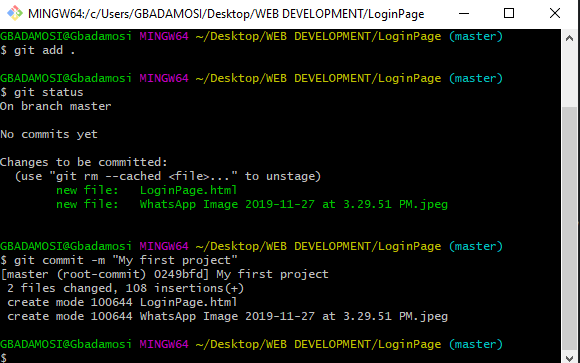 Try to run git status again to make sure your working tree is clean.
Now, it is time to push your project to Github. Remember you created a Github account minutes ago, create a new repository (repo) in your Github account and name it whatever you want.
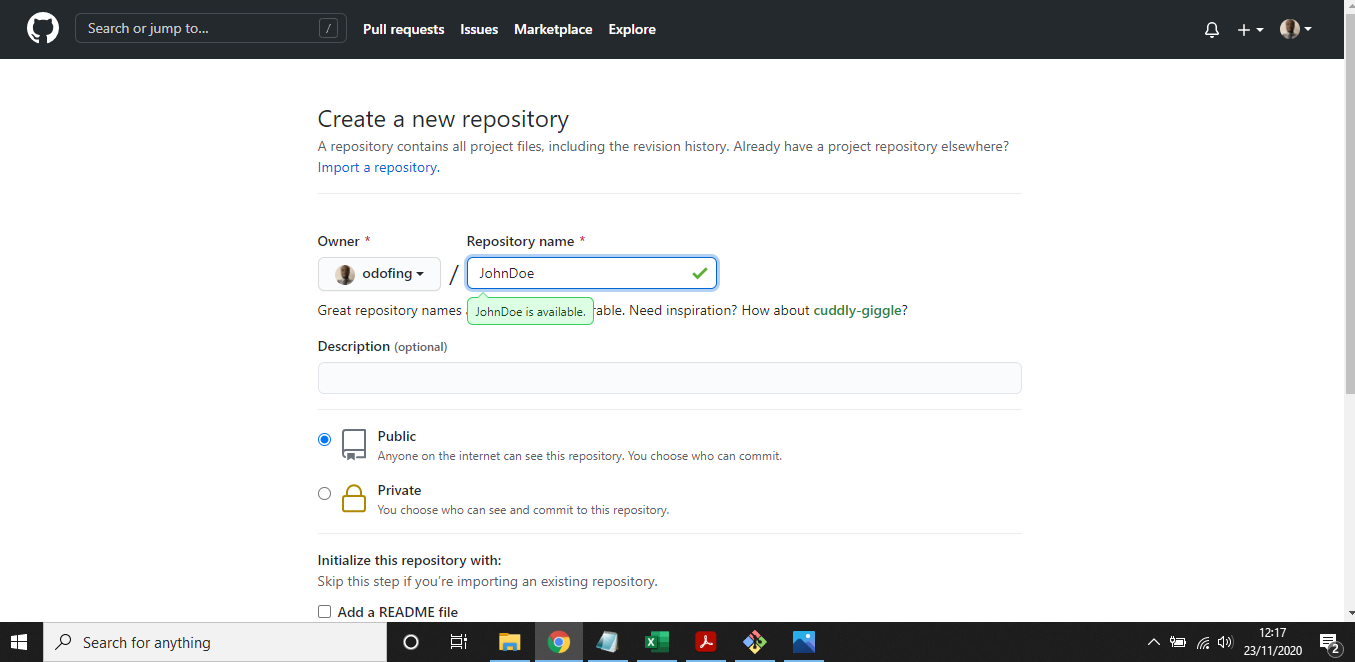
Step 6
Copy the lines highlighted in the repo created and paste them in your git terminal one after the other.
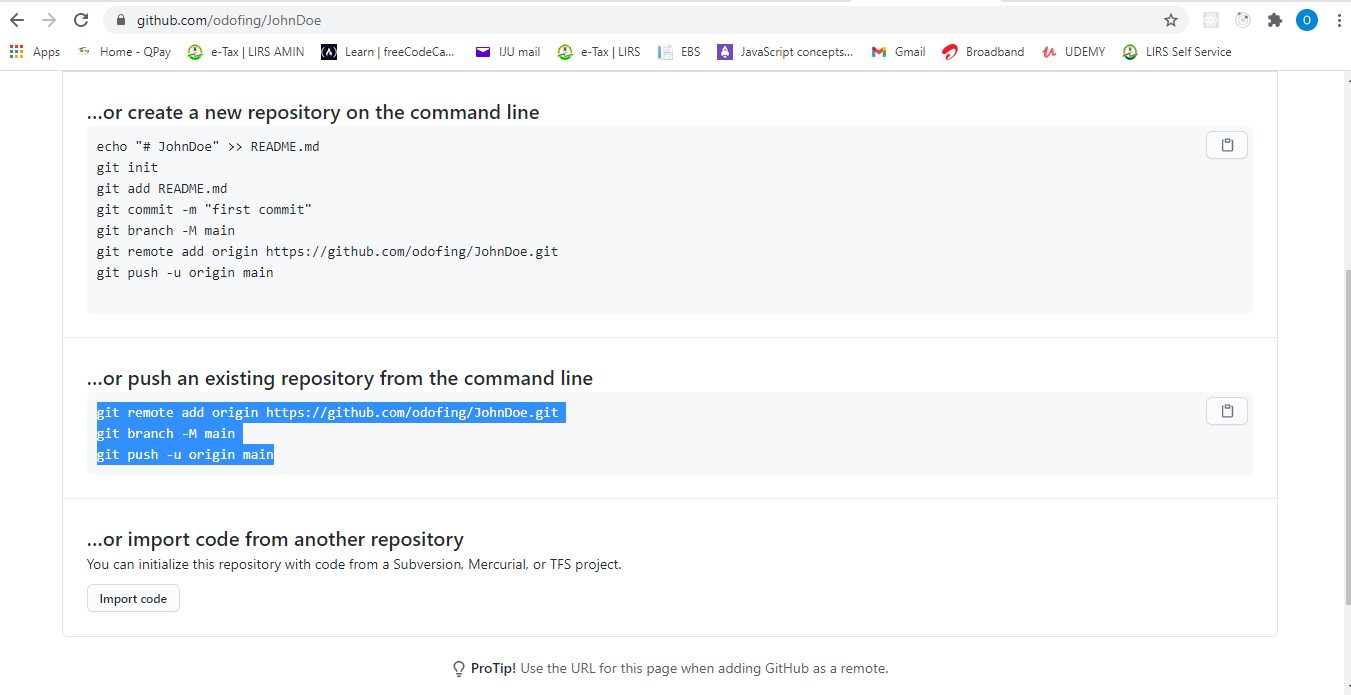
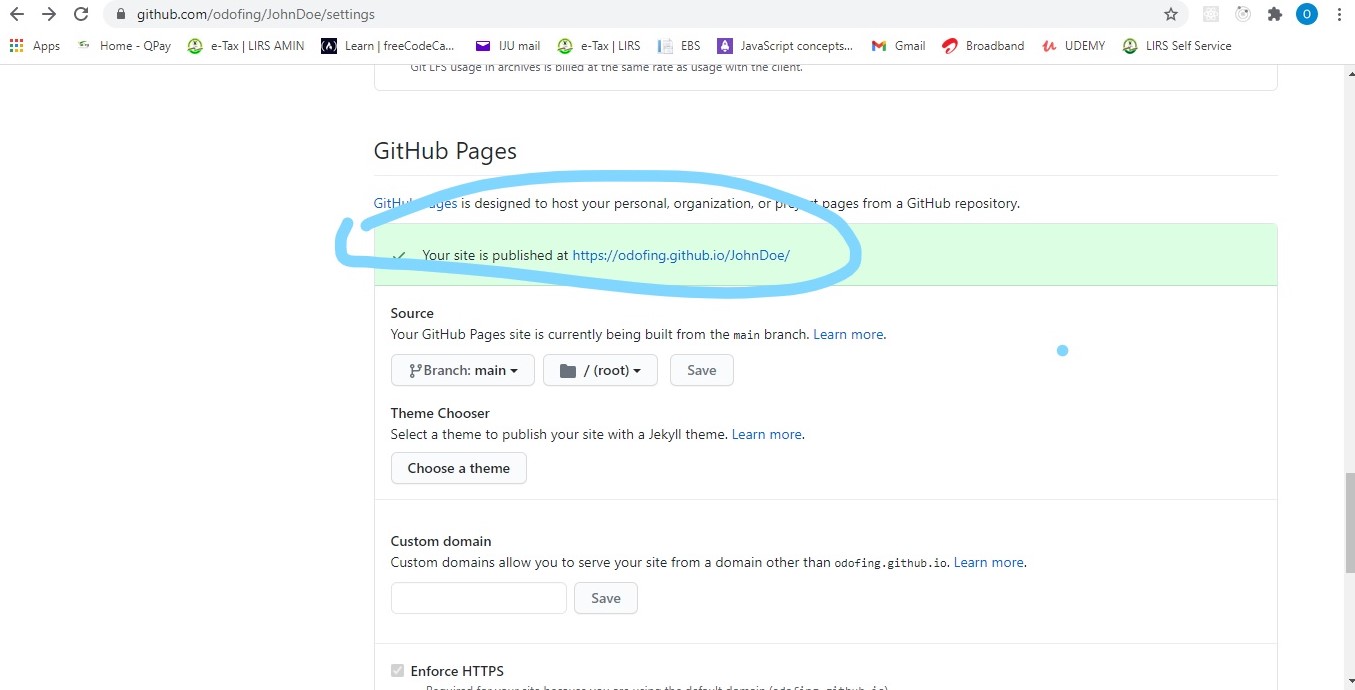
Refresh your Github repo and Viola!!! Your project is now in Github!! Now that we are done with phase one by pushing our project to Github, it is time to create Github pages. Click on settings on the menu bar of the repo and change source of your page from "none" to "main" and click save. Refresh the page after some minutes and click the link highlighted.
You can watch this video by Brad Traversy to learn more about git https://www.youtube.com/watch?v=SWYqp7iY_Tc&feature=youtu.be
Thank you for taking your time to read from beginning. Please, drop some comments if this blog is helpful.

